How to Store NFTs on a Ledger
by Editorial Staff 10:11 am
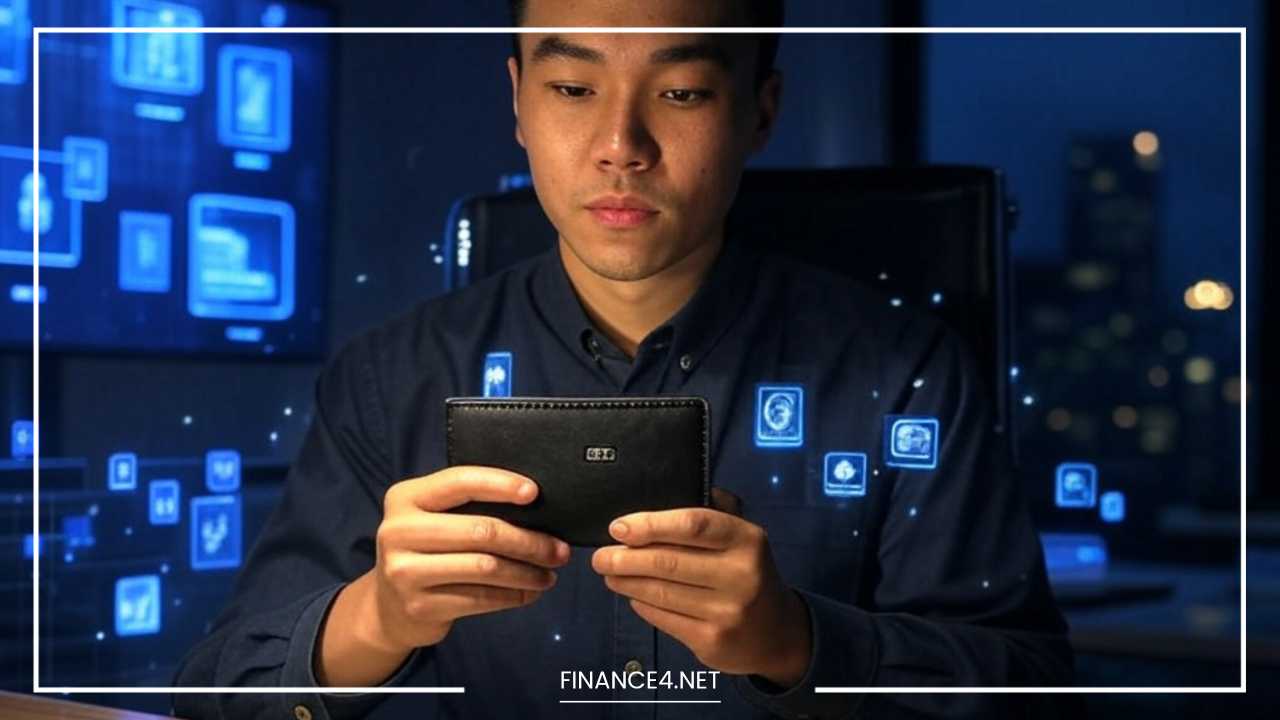
Store NFTs on a Ledger
How to Store NFTs on a Ledger: The Ultimate Guide to Securing Your Digital Assets
The realm of Non-Fungible Tokens (NFTs) has exploded into the mainstream, captivating artists, collectors, investors, and enthusiasts alike.
These unique digital assets, representing ownership of everything from digital art and music to virtual land and in-game items, have revolutionized the concept of digital ownership.
As the value and prevalence of NFTs continue their upward trajectory, the critical need for robust and reliable security measures has become undeniably apparent.
Just as one would safeguard physical valuables, ensuring the protection of your NFT collection from theft, loss, and unauthorized access is paramount.
This is where hardware wallets, particularly those offered by Ledger, step into the spotlight, providing a secure and offline sanctuary for your digital collectibles.
This comprehensive guide will delve deep into the intricacies of storing your NFTs on a Ledger hardware wallet.
We will explore the fundamental concepts of NFTs and hardware wallets, meticulously walk you through the step-by-step process of setting up your Ledger and connecting it to compatible platforms, and provide essential best practices to ensure the long-term security of your prized digital possessions.
Whether you are a seasoned NFT collector or just beginning your journey into this exciting digital landscape, this article will equip you with the knowledge and confidence to safeguard your investments effectively.
Understanding the Essence of NFTs:
Before diving into the specifics of storage, it’s crucial to have a solid understanding of what exactly an NFT is.
At its core, a Non-Fungible Token is a unique digital asset that resides on a blockchain, most commonly the Ethereum blockchain, although other platforms like Solana, Tezos, and Cardano are also gaining traction in the NFT space.
The term “non-fungible” is key here, signifying that each token is distinct and cannot be interchanged with another.
This contrasts with “fungible” assets like cryptocurrencies (e.g., Bitcoin, Ether), where one unit is identical and interchangeable with another.
The uniqueness of an NFT is established through its metadata, which is permanently recorded on the blockchain during the “minting” process.
This metadata can contain information about the creator, the specific digital asset it represents (such as an image file, audio track, video clip, or even a piece of code), and any associated rights or utilities.
The ownership of an NFT is also immutably recorded on the blockchain, making it publicly verifiable and transparent.
When you own an NFT, you essentially hold the private key that grants you control over the digital asset associated with that token. This ownership record cannot be altered or tampered with without the owner’s explicit consent.
The applications of NFTs are incredibly diverse and continue to expand. They have become particularly popular in the art world, providing a mechanism for digital artists to authenticate and sell their creations.
Beyond art, NFTs are used to represent collectibles, virtual real estate in metaverse platforms, in-game items, music, videos, domain names, and even tickets to events.
The potential for NFTs to revolutionize various industries is vast, making their secure storage an increasingly vital concern.
The Critical Importance of Secure NFT Storage:
As the value of NFTs has surged, so too has the attention of malicious actors seeking to exploit vulnerabilities and steal these valuable digital assets.
Just like any other asset of significant worth, NFTs require robust security measures to protect them from theft and unauthorized access. The way you choose to store your NFTs plays a pivotal role in their overall security.
The most common way individuals initially interact with NFTs is through “hot wallets,” which are cryptocurrency wallets that are connected to the internet.
These can include browser extensions like MetaMask, software wallets installed on your computer or smartphone, or even the custodial wallets offered by some NFT marketplaces.
While hot wallets offer convenience for trading and interacting with the NFT ecosystem, their constant online connectivity makes them inherently more vulnerable to a range of cyber threats.
Because hot wallets are connected to the internet, they are susceptible to hacking attempts, phishing scams, malware infections, and other sophisticated cyberattacks.
If a malicious actor gains access to your hot wallet, they can potentially steal your private keys – the cryptographic codes that grant control over your NFTs – and transfer your digital assets to their own address, leaving you with little to no recourse.
The decentralized nature of blockchain technology means that once a transaction is confirmed, it is typically irreversible.
This is precisely where the significance of secure storage solutions, particularly hardware wallets like those offered by Ledger, becomes unequivocally clear.
A hardware wallet is a physical device specifically designed to store your private keys offline, in a secure and isolated environment.
By keeping your private keys segregated from internet-connected devices like computers and smartphones, a Ledger wallet dramatically reduces the attack surface and provides a significantly higher level of security for your valuable NFT collection.
Demystifying Ledger Hardware Wallets:
A Ledger hardware wallet is a compact, physical device engineered to securely store your private keys for a wide array of cryptocurrencies and digital assets, including NFTs.
Unlike hot wallets that exist in the digital realm, Ledger wallets keep your private keys offline within a secure element – a specialized, tamper-resistant chip specifically designed to protect sensitive cryptographic information.
The fundamental principle behind a hardware wallet is to isolate your private keys from the potential vulnerabilities inherent in internet-connected devices.
When you wish to execute a transaction involving your NFTs, such as transferring them to another address or signing a purchase on an NFT marketplace, the transaction details are relayed to your Ledger device for your meticulous review and explicit approval.
You must physically confirm the transaction on the device itself by pressing designated buttons, ensuring that no unauthorized transactions can be initiated or completed without your direct, physical consent.
Ledger offers several models of hardware wallets, with the most popular options being the Nano S Plus and the Nano X.
Both models provide a robust level of security for safeguarding your private keys, but they differ in features such as storage capacity for installing multiple blockchain applications and connectivity options (the Nano X offers Bluetooth connectivity in addition to USB).
Regardless of the model you choose, the core security principles remain the same: your private keys are stored offline and transactions require physical confirmation on the device.
Understanding How Ledger Interacts with NFTs:
It’s crucial to grasp that a Ledger device doesn’t technically “store” the NFT file itself. The actual NFT, along with its associated metadata, permanently resides on the blockchain (e.g., Ethereum).
What your Ledger device securely holds are the private keys that grant you control over the specific blockchain address where your NFTs are held.
Think of your blockchain address as a publicly visible digital mailbox, and your private key as the physical key that unlocks that mailbox.
Anyone can observe what’s inside the mailbox (the NFTs associated with your address are publicly viewable on the blockchain), but only someone possessing the correct key (your private key) has the authority to move the contents (transfer or manage your NFTs).
When you utilize a Ledger wallet to manage your NFTs, you are essentially employing the secure private keys stored on your Ledger to interact with the blockchain through a compatible interface.
This interface is typically provided by a third-party software wallet, such as MetaMask, or directly by NFT marketplaces that have integrated support for Ledger devices.
The typical process involves connecting your Ledger device to your computer via a USB cable and then linking it to a compatible software wallet or platform. When you wish to perform an action involving your NFTs, such as signing a transaction to buy or sell an NFT, the request is transmitted to your Ledger device.
You can then meticulously review the transaction details on the secure screen of your Ledger and approve it by physically pressing the designated buttons.
This ensures that your private keys never leave the secure confines of your Ledger device, effectively shielding your NFTs from online threats.
A Step-by-Step Guide: Storing Your NFTs on a Ledger:
1. Initial Setup of Your Ledger Device:
- Unboxing and Initial Configuration: Carefully unpack your Ledger device and follow the manufacturer’s instructions to power it on. You will typically need to connect it to your computer using the provided USB cable and navigate to the official Ledger website (ledger.com/start) to initiate the setup process.
- Generating Your Unique Recovery Phrase: This is arguably the most critical step in the entire process. Your Ledger device will generate a unique sequence of 24 words (sometimes 12 or 18 words depending on the specific model). This recovery phrase serves as your ultimate backup. If your Ledger device is ever lost, stolen, damaged, or malfunctions, you can use this recovery phrase to restore access to your cryptocurrency and NFT holdings on a new Ledger device. It is absolutely imperative that you write down this recovery phrase on the provided recovery sheet in the exact order presented and store it in a secure and secret location, away from your computer and any form of internet access. Never take a digital photograph of your recovery phrase or store it online.
- Setting Your Personal Identification Number (PIN): You will be prompted to set a PIN code for your Ledger device. This PIN code is required to unlock your Ledger and authorize transactions. Choose a strong and memorable PIN code that is difficult for others to guess.
2. Installing the Necessary Blockchain Application (e.g., Ethereum):
- Install Ledger Live: Download and install the official Ledger Live application on your computer from the secure Ledger website. This application serves as your primary interface for managing your Ledger device, installing blockchain applications, and viewing your account balances.
- Connect Your Ledger to Ledger Live: Connect your unlocked Ledger device to your computer using the USB cable and open the Ledger Live application. Follow the on-screen instructions to pair your device with Ledger Live.
- Install the Ethereum Application: Since the vast majority of NFTs reside on the Ethereum blockchain, you will need to install the Ethereum application on your Ledger device. Within Ledger Live, navigate to the “Manager” tab, ensure your Ledger device is connected and unlocked, and search for “Ethereum” in the application catalog. Click the “Install” button to install the Ethereum application on your Ledger. Crucially, ensure that the Ethereum application is open on your Ledger device whenever you intend to interact with Ethereum-based NFTs.
3. Connecting Your Ledger to a Compatible NFT Platform via MetaMask:
While some NFT marketplaces are beginning to offer direct integration with Ledger devices, the most prevalent method for interacting with NFTs using a Ledger involves utilizing a third-party software wallet like MetaMask.
- Install the MetaMask Browser Extension: If you haven’t already done so, download and install the official MetaMask browser extension for your preferred web browser (Chrome, Firefox, Brave, or Edge) from the legitimate MetaMask website (metamask.io).
- Create a New MetaMask Wallet (or Connect an Existing One): When you first launch MetaMask, you will be presented with the option to either create a new wallet or import an existing one using a seed phrase. For enhanced security when using a Ledger, it is generally recommended to connect a new MetaMask wallet to your Ledger device rather than importing the seed phrase of an existing software wallet.
- Connect MetaMask to Your Ledger Device:
- Open the MetaMask browser extension.
- Click on your profile icon located in the top right corner of the MetaMask interface and select the “Connect Hardware Wallet” option from the dropdown menu.
- Choose “Ledger” from the list of available hardware wallets and click the “Continue” button.
- Ensure that your Ledger device is connected to your computer via USB, is unlocked using your PIN, and that the Ethereum application is currently open on the device.
- MetaMask will then display a list of Ethereum addresses that are derived from your Ledger device. Select the specific Ethereum address you wish to use for managing your NFTs and click the “Unlock” button.
4. Viewing Your NFTs on the NFT Platform:
- Navigate to Your Profile or Collection: Once your Ledger-connected MetaMask wallet is properly configured, navigate to your preferred NFT marketplace (e.g., OpenSea, Rarible, Nifty Gateway). Connect your MetaMask wallet to the platform if you are prompted to do so.
- Your NFTs Should Now Be Visible: Navigate to your profile or collection section on the NFT marketplace. You should now be able to see the NFTs that are associated with the Ethereum address that is controlled by your Ledger device. It is important to reiterate that the NFTs themselves are not physically stored on the Ledger device, but rather they reside on the blockchain and are accessible through the specific blockchain address whose private key is secured by your Ledger.
5. Receiving NFTs to Your Ledger-Secured Address:
- Locate Your Ethereum Address: Within the MetaMask interface, with your Ledger device connected and the appropriate account selected, your unique Ethereum address will be displayed at the top of the interface. You can easily click on this address to copy it to your clipboard.
- Provide the Address to the Sender: If you are receiving an NFT from another individual or transferring an NFT from a different wallet, you will need to provide them with this specific Ethereum address.
- Confirm Receipt of the NFT: Once the sender initiates the transfer of the NFT, it will be sent to the Ethereum address that is secured by your Ledger device. After the transaction is confirmed on the blockchain, you should be able to view the newly received NFT within your collection on the NFT marketplace that is connected to your Ledger-linked MetaMask wallet.
Managing Your NFT Collection with Ledger:
Once your NFTs are securely stored on an address protected by your Ledger device, you can manage your collection through compatible NFT platforms and software wallets.
- Securely Sending NFTs: If you wish to send an NFT to another blockchain address, you will initiate the transaction through a compatible platform that is connected to your Ledger-linked MetaMask wallet. When you are prompted to sign the transaction, you will be required to meticulously review the transaction details displayed on your Ledger device’s screen and then physically approve the transaction by pressing the designated buttons. This crucial step ensures that you maintain complete control over your NFTs and that no one can transfer them without your explicit physical confirmation.
- Interacting with NFT Marketplaces and Decentralized Applications (dApps): You can confidently use your Ledger-secured address to interact with a wide variety of NFT marketplaces and decentralized applications (dApps) within the NFT ecosystem. Whether you are looking to purchase a new NFT, list one of your own for sale, or interact with a smart contract related to an NFT project, any transaction that involves your digital assets will necessitate your physical approval on your Ledger device.
- Always Verify Transaction Details on Your Ledger: Before you approve any transaction on your Ledger device, it is absolutely essential to carefully verify all the details that are displayed on the device’s secure screen. This includes the recipient’s blockchain address, the specific NFT being transferred, and the amount of any cryptocurrency involved in the transaction. Adhering to this practice diligently will significantly help prevent accidental transfers or falling victim to sophisticated phishing scams.
Essential Best Practices for NFT Security with Ledger:
While utilizing a Ledger hardware wallet significantly enhances the security of your NFT collection, it is imperative to adhere to certain best practices to further fortify the protection of your valuable digital assets:
- Keep Your Recovery Phrase Absolutely Safe and Offline: Your recovery phrase is your ultimate key to accessing your crypto and NFTs. Never store it digitally on your computer or phone, and never share it with anyone under any circumstances. Store it in a secure, physical location that only you have access to.
- Never Share Your PIN Code: Your PIN code protects your Ledger device from unauthorized physical access. Keep it confidential and never disclose it to anyone.
- Exercise Extreme Caution with Phishing Scams and Fake Websites: Always double-check the URLs of any websites you visit, especially those related to cryptocurrencies and NFTs. Be highly wary of unsolicited emails, messages, or social media posts that ask for your recovery phrase, PIN code, or any other sensitive information. Legitimate companies like Ledger will never request this information.
- Always Verify the Authenticity of NFT Platforms: Ensure that you are interacting with legitimate and reputable NFT marketplaces and platforms. Be wary of new or unfamiliar platforms with little to no track record.
- Keep Your Ledger Firmware and Ledger Live Software Updated: Regularly update your Ledger device’s firmware and your Ledger Live software to the latest versions. These updates often include crucial security patches and new features that can further enhance the security of your device.
- Utilize a Strong and Unique Password for Your MetaMask Wallet: While your Ledger device secures your private keys, your MetaMask wallet also has a password that protects access to the software interface on your computer. Choose a strong and unique password that you do not use for any other online accounts.
Troubleshooting Common Issues:
While the process of storing NFTs on a Ledger is generally straightforward, you might occasionally encounter some common issues. Here are a few potential problems and their possible solutions:
- Ledger Device Not Connecting to MetaMask: Ensure that your Ledger device is properly connected to your computer via USB, is unlocked using your PIN, and that the correct blockchain application (e.g., Ethereum) is open on the device. Also, verify that you have selected the correct derivation path within your MetaMask settings (the default setting is usually appropriate for most users). Try restarting your web browser or the Ledger Live application.
- NFTs Not Appearing in Your Wallet Interface: Sometimes, it can take a short period for NFT marketplaces to recognize
the NFTs associated with your Ethereum address. Try refreshing your MetaMask connection or logging out and back into the NFT platform.
- Transaction Errors or Failures: If a transaction fails, double-check the gas fees associated with the transaction and ensure that you have sufficient funds in your Ethereum wallet to cover the transaction fees. You may need to adjust the gas settings in MetaMask to ensure the transaction is processed successfully.
Final Thoughts:
As NFTs continue to captivate the world, safeguarding these valuable digital assets becomes ever more essential.
A Ledger hardware wallet offers one of the most secure methods for protecting your NFTs from potential threats, giving you peace of mind knowing that your private keys are stored offline in a secure environment.
By following the step-by-step guide outlined above, you’ll be well on your way to securely managing your NFTs and ensuring that your digital collection remains safe from unauthorized access.
Always remember, while the world of NFTs offers exciting opportunities, it is paramount to take the necessary steps to protect your assets and remain vigilant against potential threats.
A combination of good security practices and the protection offered by a Ledger hardware wallet will ensure that your NFTs are safeguarded for years to come.